The biggest advantage of 1Password is its cross-platform capability. It provides perfect support across Apple’s iOS and macOS, Google’s Android, Microsoft’s Windows, and Linux. This allows you to use Safari on macOS, Edge on Windows, and Chrome on Android, all with seamless password management support. This is something Apple’s native password manager cannot offer.
To learn how to use 1Password effectively, the official Get started with 1Password guide is the best learning material. A quick browse through it will cover the basics completely.
This document will only focus on some key points to consider when using 1Password on macOS and iOS.
Installation
On both macOS and iOS, the 1Password extension needs to be enabled for Safari.
The Safari extension for macOS can be installed directly from the App Store.
For installing the extension on iOS, please refer to: Get to know 1Password for Safari on your iPhone or iPad
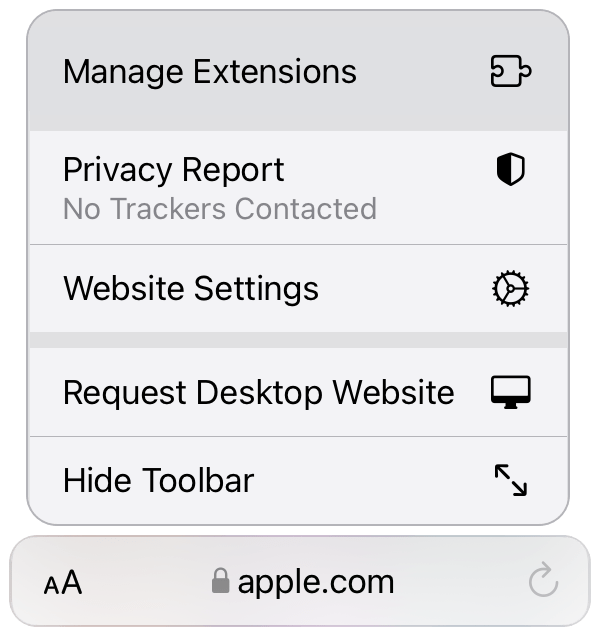
Open Safari to any website and tap
in the address bar.
If you’re using an iPad, tap
in the address bar.
Tap Manage Extensions and turn on 1Password, then tap Done.
Turn off the built-in password manager
Since Safari has its own password manager, having both active can cause conflicts with 1Password. Therefore, you need to disable the built-in password manager.
For specific steps, refer to the official guide: Turn off the built-in password manager in your browser.
- Settings for Safari on macOS
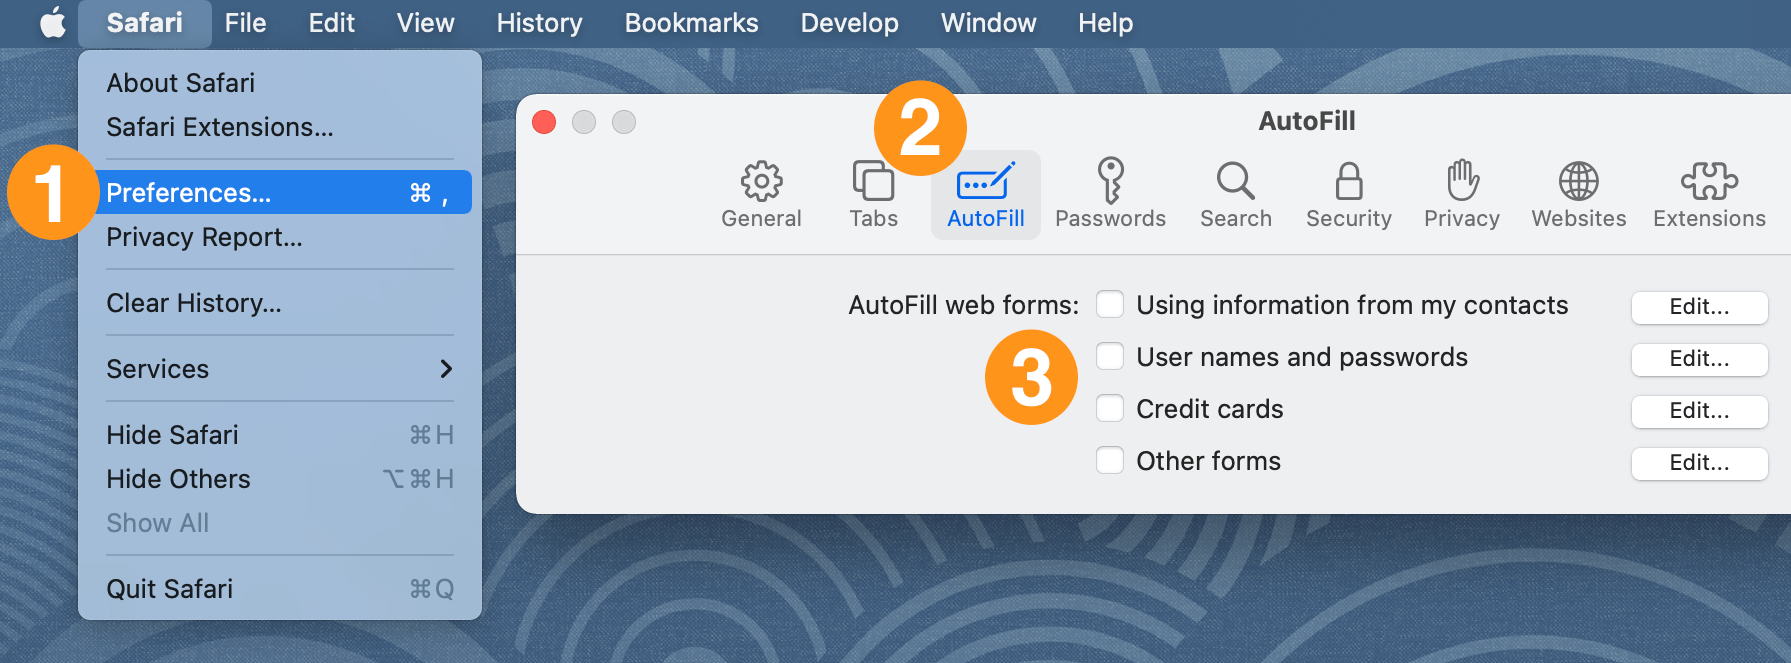
To stop Safari from asking to save your passwords:
- Click the Safari menu and choose Preferences.
- Click the AutoFill icon.
- Turn off all the AutoFill web forms settings: “Using info from my contacts”, “User names and passwords”, “Credit cards”, and “Other forms”.
- Settings for Safari on iOS
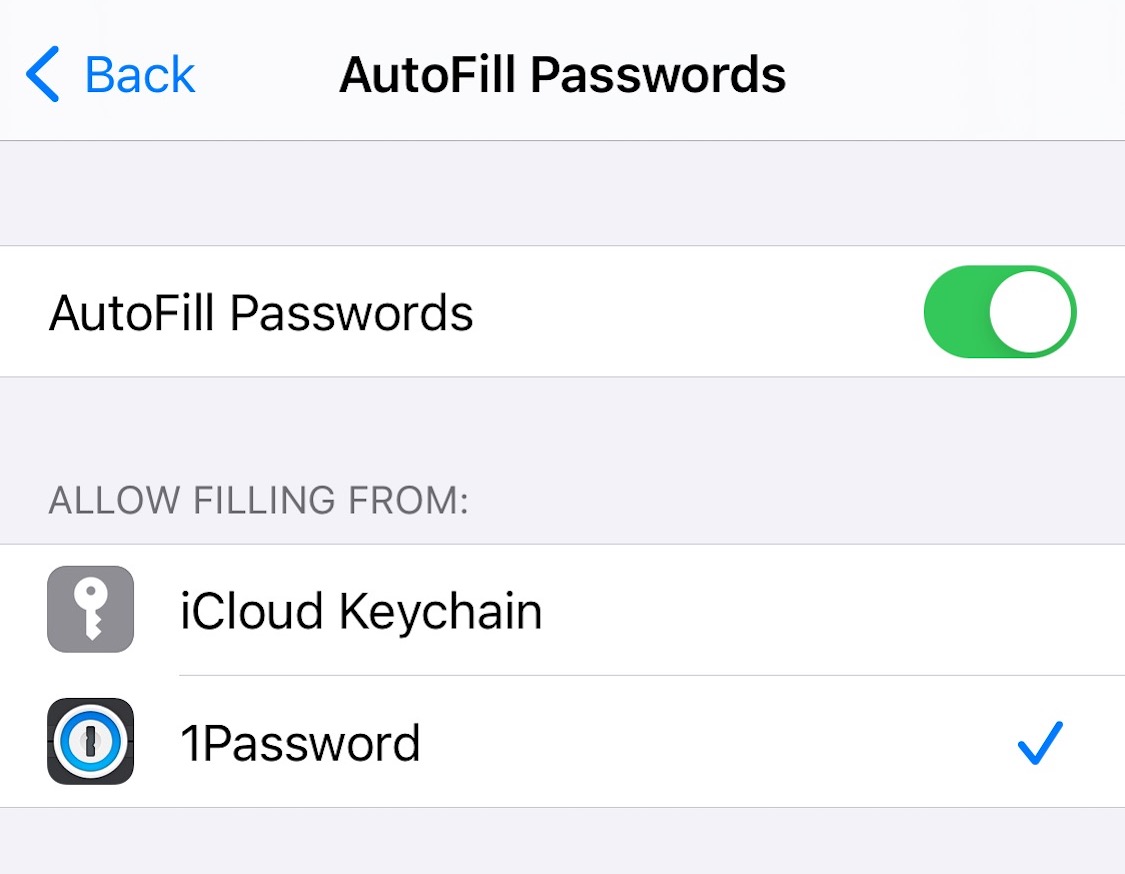
To stop Safari from asking to save your passwords:
- Open Settings, then tap Passwords & Accounts.
- Tap AutoFill Passwords.
- Turn off iCloud Keychain.
App Support on iOS
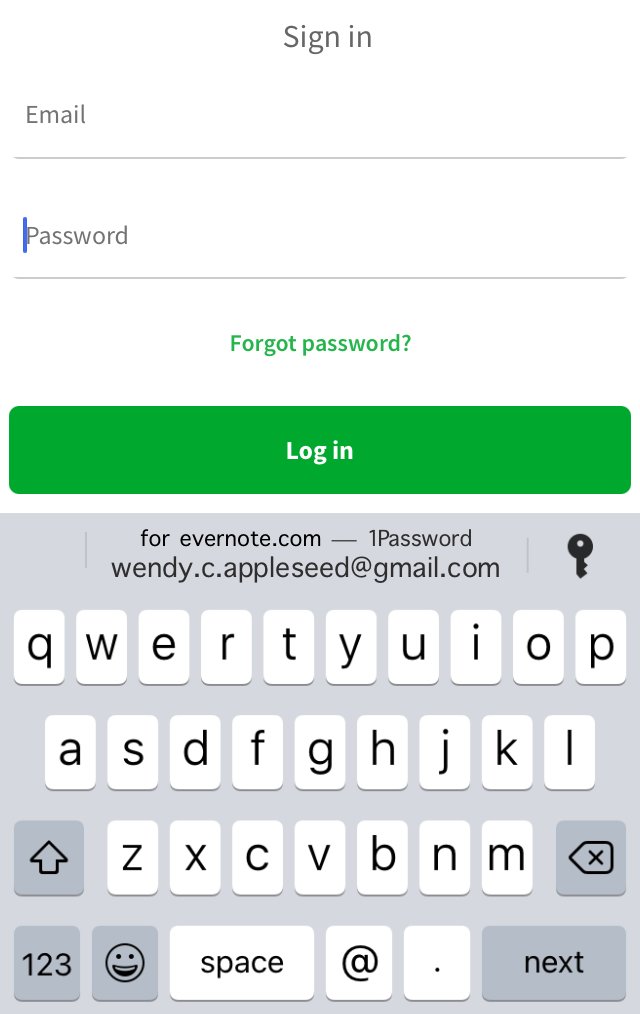
The experience of using 1Password in iOS apps is consistent with Safari. As long as an app uses the standard iOS keyboard, a key icon will automatically appear in the username and password fields. Tapping the key will bring up 1Password for autofilling.
However, many domestic banking apps in China do not use the built-in iOS keyboard, which prevents 1Password from being invoked. In such cases, you have to manually open 1Password to copy a password or create a new one.
Universal Autofill
Universal Autofill is a major feature upgrade in 1Password 8. Universal Autofill provides true “global autofill.” You only need to remember one shortcut, Command + \, to have 1Password automatically fill in your passwords anywhere, including browsers, applications, terminals, and system prompts.

Two-Factor Authentication
For websites that support 1Password’s two-factor authentication, I have migrated them to 1Password.
If 1Password itself has two-factor authentication enabled, it requires a third-party authenticator, as it cannot store its own one-time password, as stated in the official documentation. I chose Microsoft’s Authenticator.
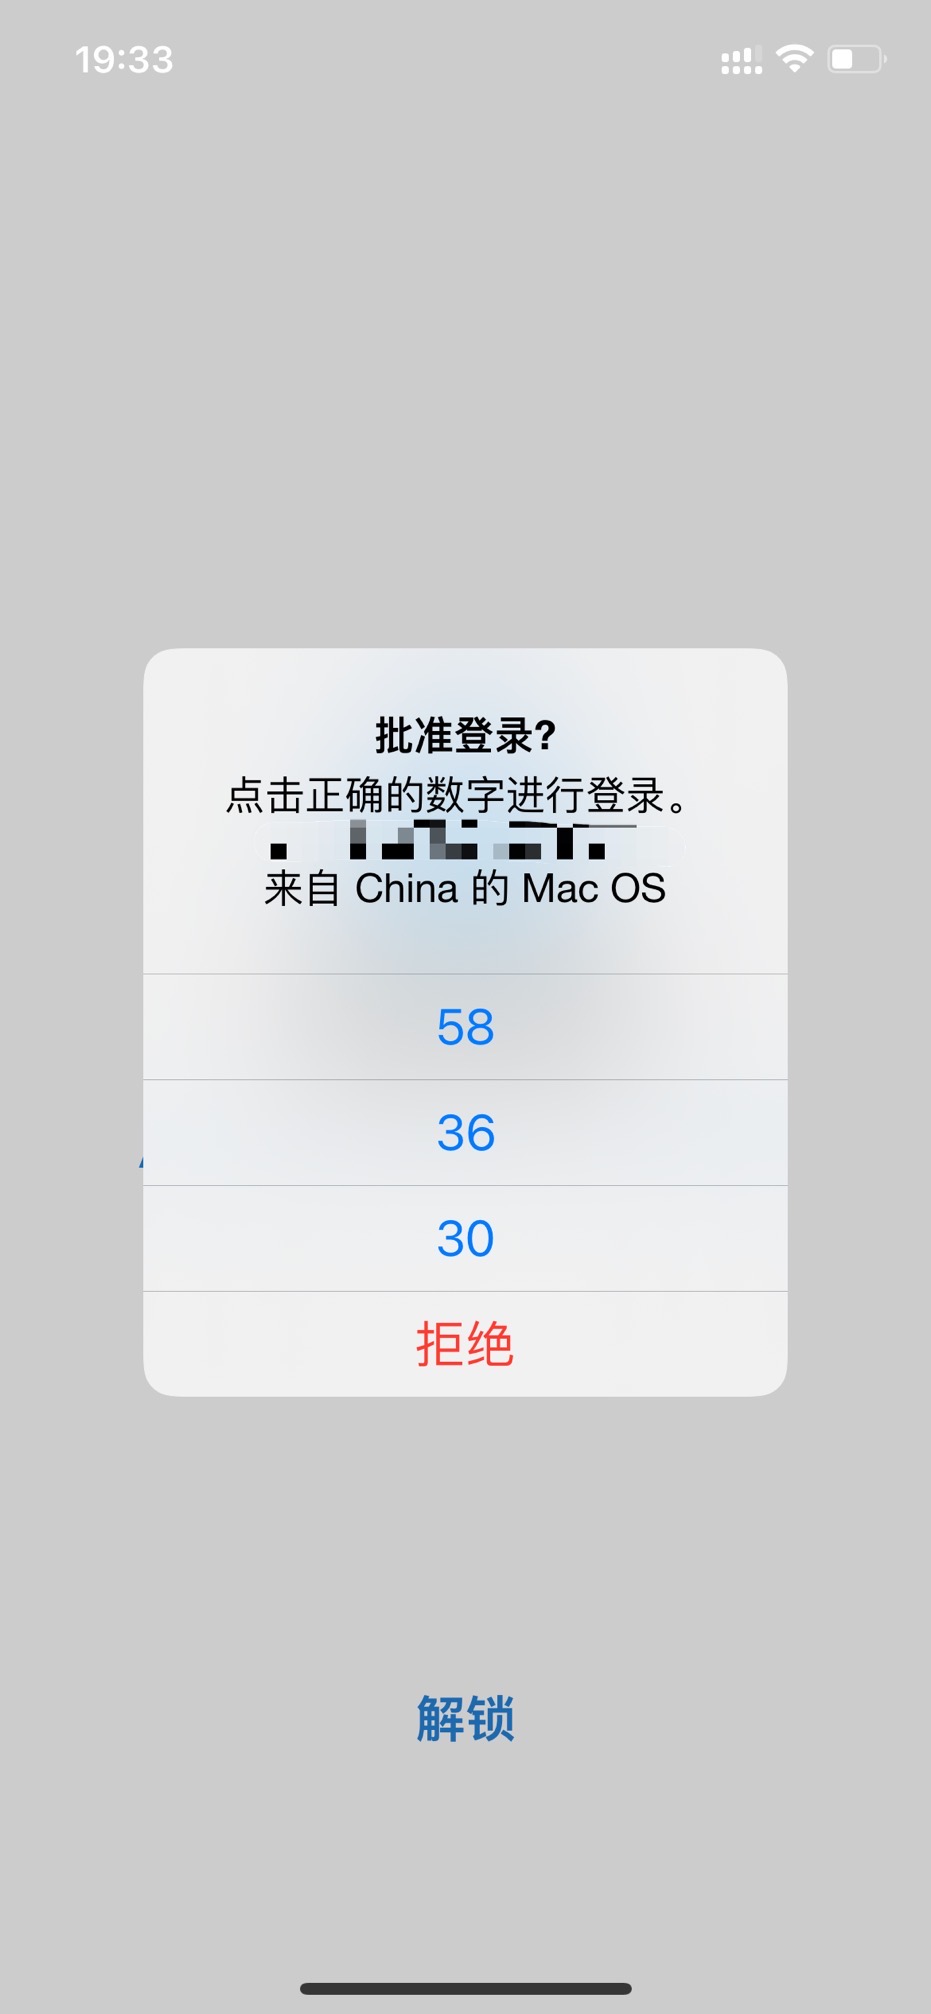
Microsoft Authenticator supports backup and recovery, which is very convenient when switching phones. Additionally, the experience of logging into a Microsoft account using the Authenticator is excellent; you don’t need to enter a password, just confirm on your phone. The experience is similar to scanning a QR code, but without the scanning :)
Manage SSH Keys
1Password can store your SSH keys and act as an SSH agent, seamlessly integrating with your SSH and Git workflows. It also automatically helps you copy and paste your public key when required on platforms like GitHub.
Generate or import SSH keys
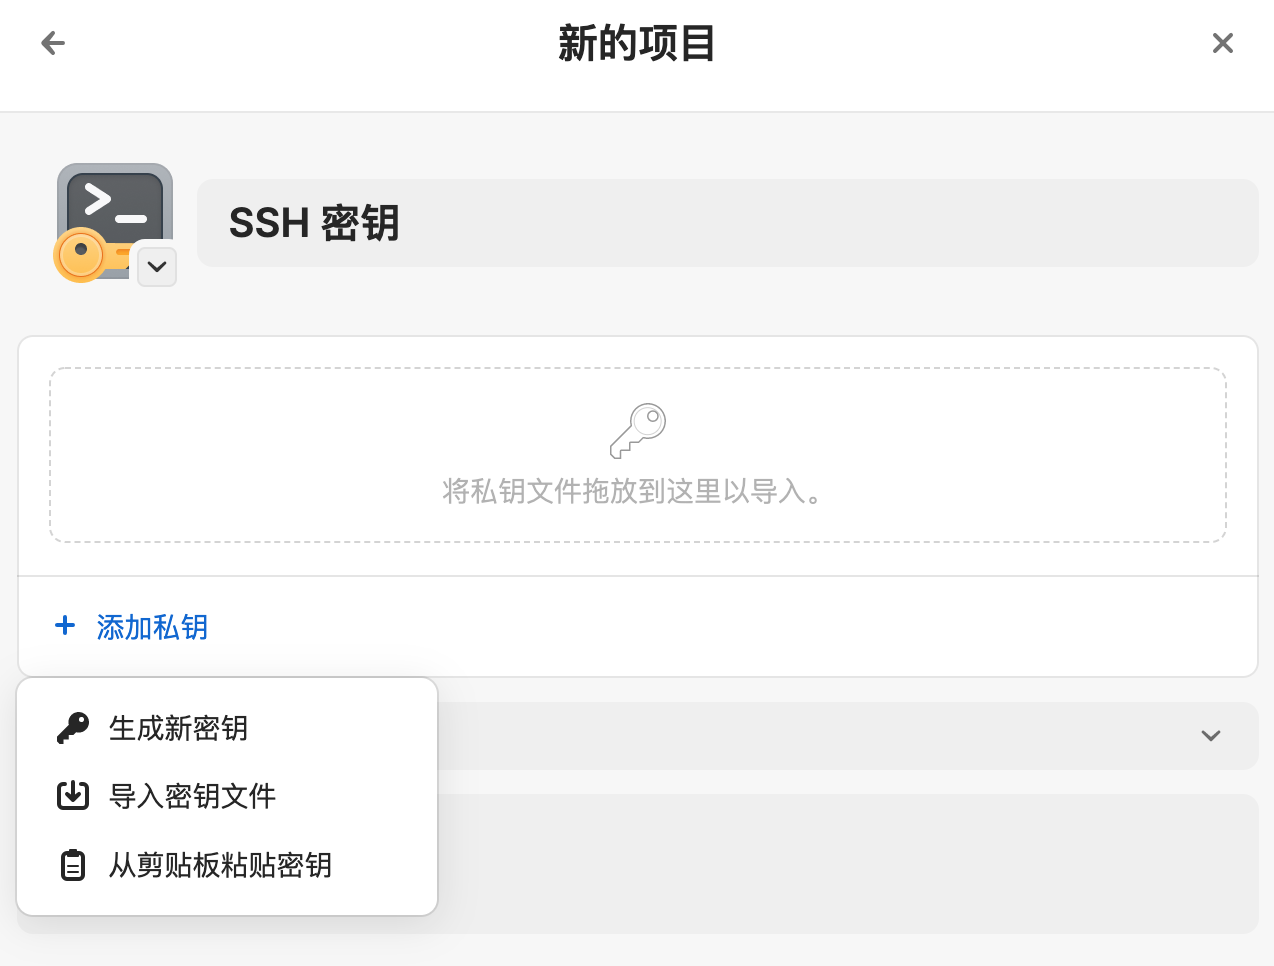
You can generate an SSH key yourself using the ssh-keygen command, or have one generated automatically when creating an SSH key item in 1Password.
Enable the 1Password SSH Agent
The 1Password SSH Agent uses the SSH keys you’ve saved in 1Password to seamlessly integrate with your Git and SSH workflows. It can authenticate your Git and SSH clients, which never get to read your private key.
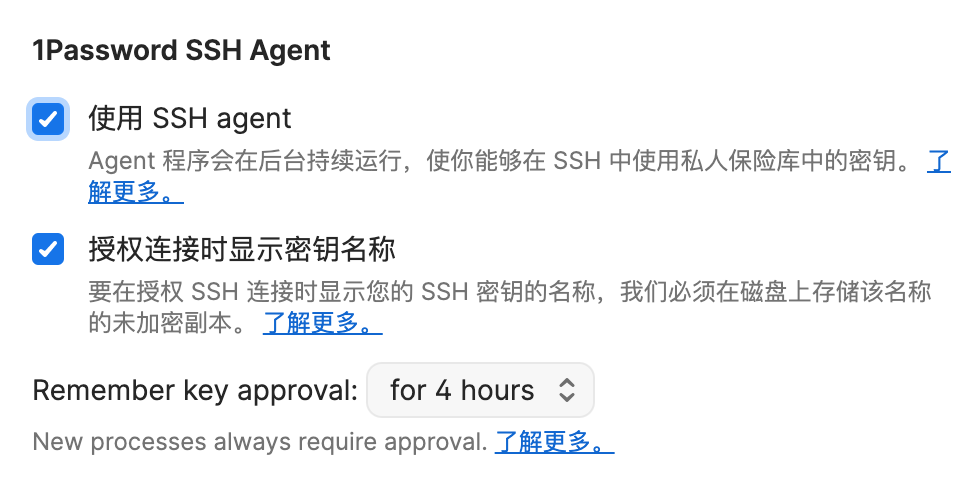
First, you need to enable the 1Password SSH Agent to run in the background and handle authentication for your SSH clients. Go to 1Password > Preferences > Developer, and check “Use the SSH agent” and “Show key names when authorizing connections”.
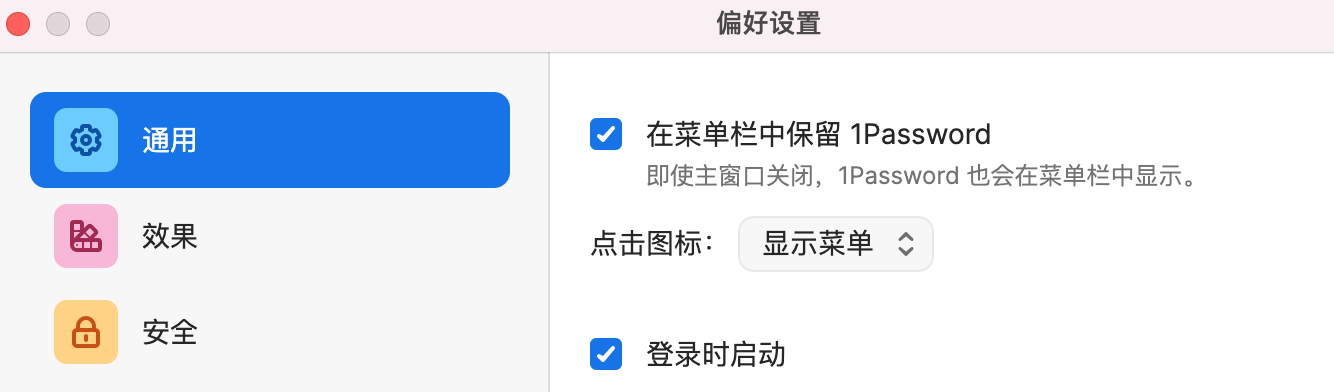
To ensure the SSH Agent runs continuously in the background, go to 1Password > Preferences > General and check “Keep 1Password in the menu bar”.
Configure the SSH client
To allow your SSH client to use the 1Password SSH agent, you need to add the IdentityAgent configuration to your ~/.ssh/config file:
|
|
You can also set the SSH_AUTH_SOCK environment variable in your shell:
|
|
If you find the agent path too complex, you can create a symbolic link first:
|
|
This allows you to reference the symbolic link when setting the environment variable:
|
|
Now, your SSH client can use the 1Password SSH agent when logging into remote hosts.
You can use the following command to see the SSH keys managed by the 1Password SSH agent:
|
|
Publish the SSH public key
You need a way to publish your SSH public key to the remote server so it can use the public key to verify your identity.
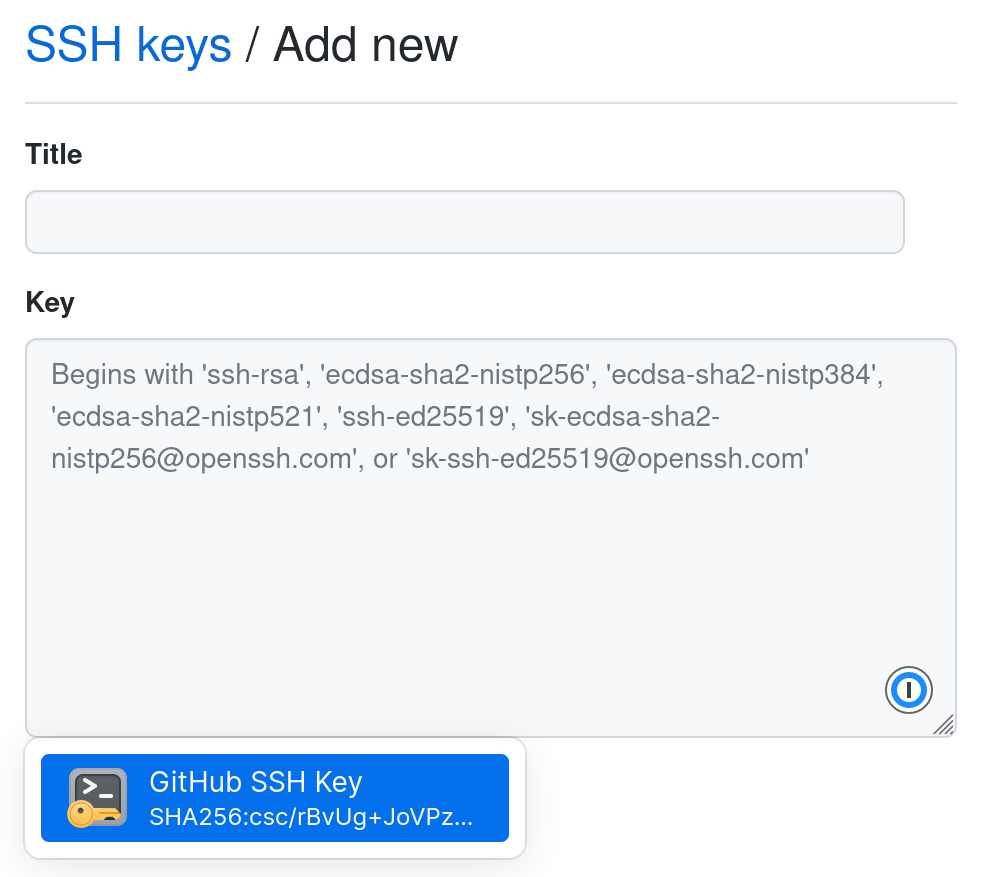
One method is to upload the public key to the service provider’s website and associate it with your account. For example, you can upload your public key on the GitHub SSH key settings page. The Tencent Cloud management console also allows you to upload your public key and associate it with your purchased servers. When you need to paste the public key on a webpage, 1Password will autofill it just like a password.
Another method is to use the ssh-copy-id command to copy the public key directly to the remote server.
Regardless of the method you use, always remember that you are publishing the public key. Be careful not to leak your private key.
Manage Github Signing Key
Github has started to support using SSH keys to sign commits, which means you can use the SSH keys managed by 1Password to sign your git commits.
The setup process can be found at Sign your Git commits with 1Password and mainly involves two steps:
- Generate a Signing Key on GitHub. Go to https://github.com/settings/keys, select “New SSH Key”, choose the key type as “Signing Key”, and then paste the SSH public key managed by 1Password.

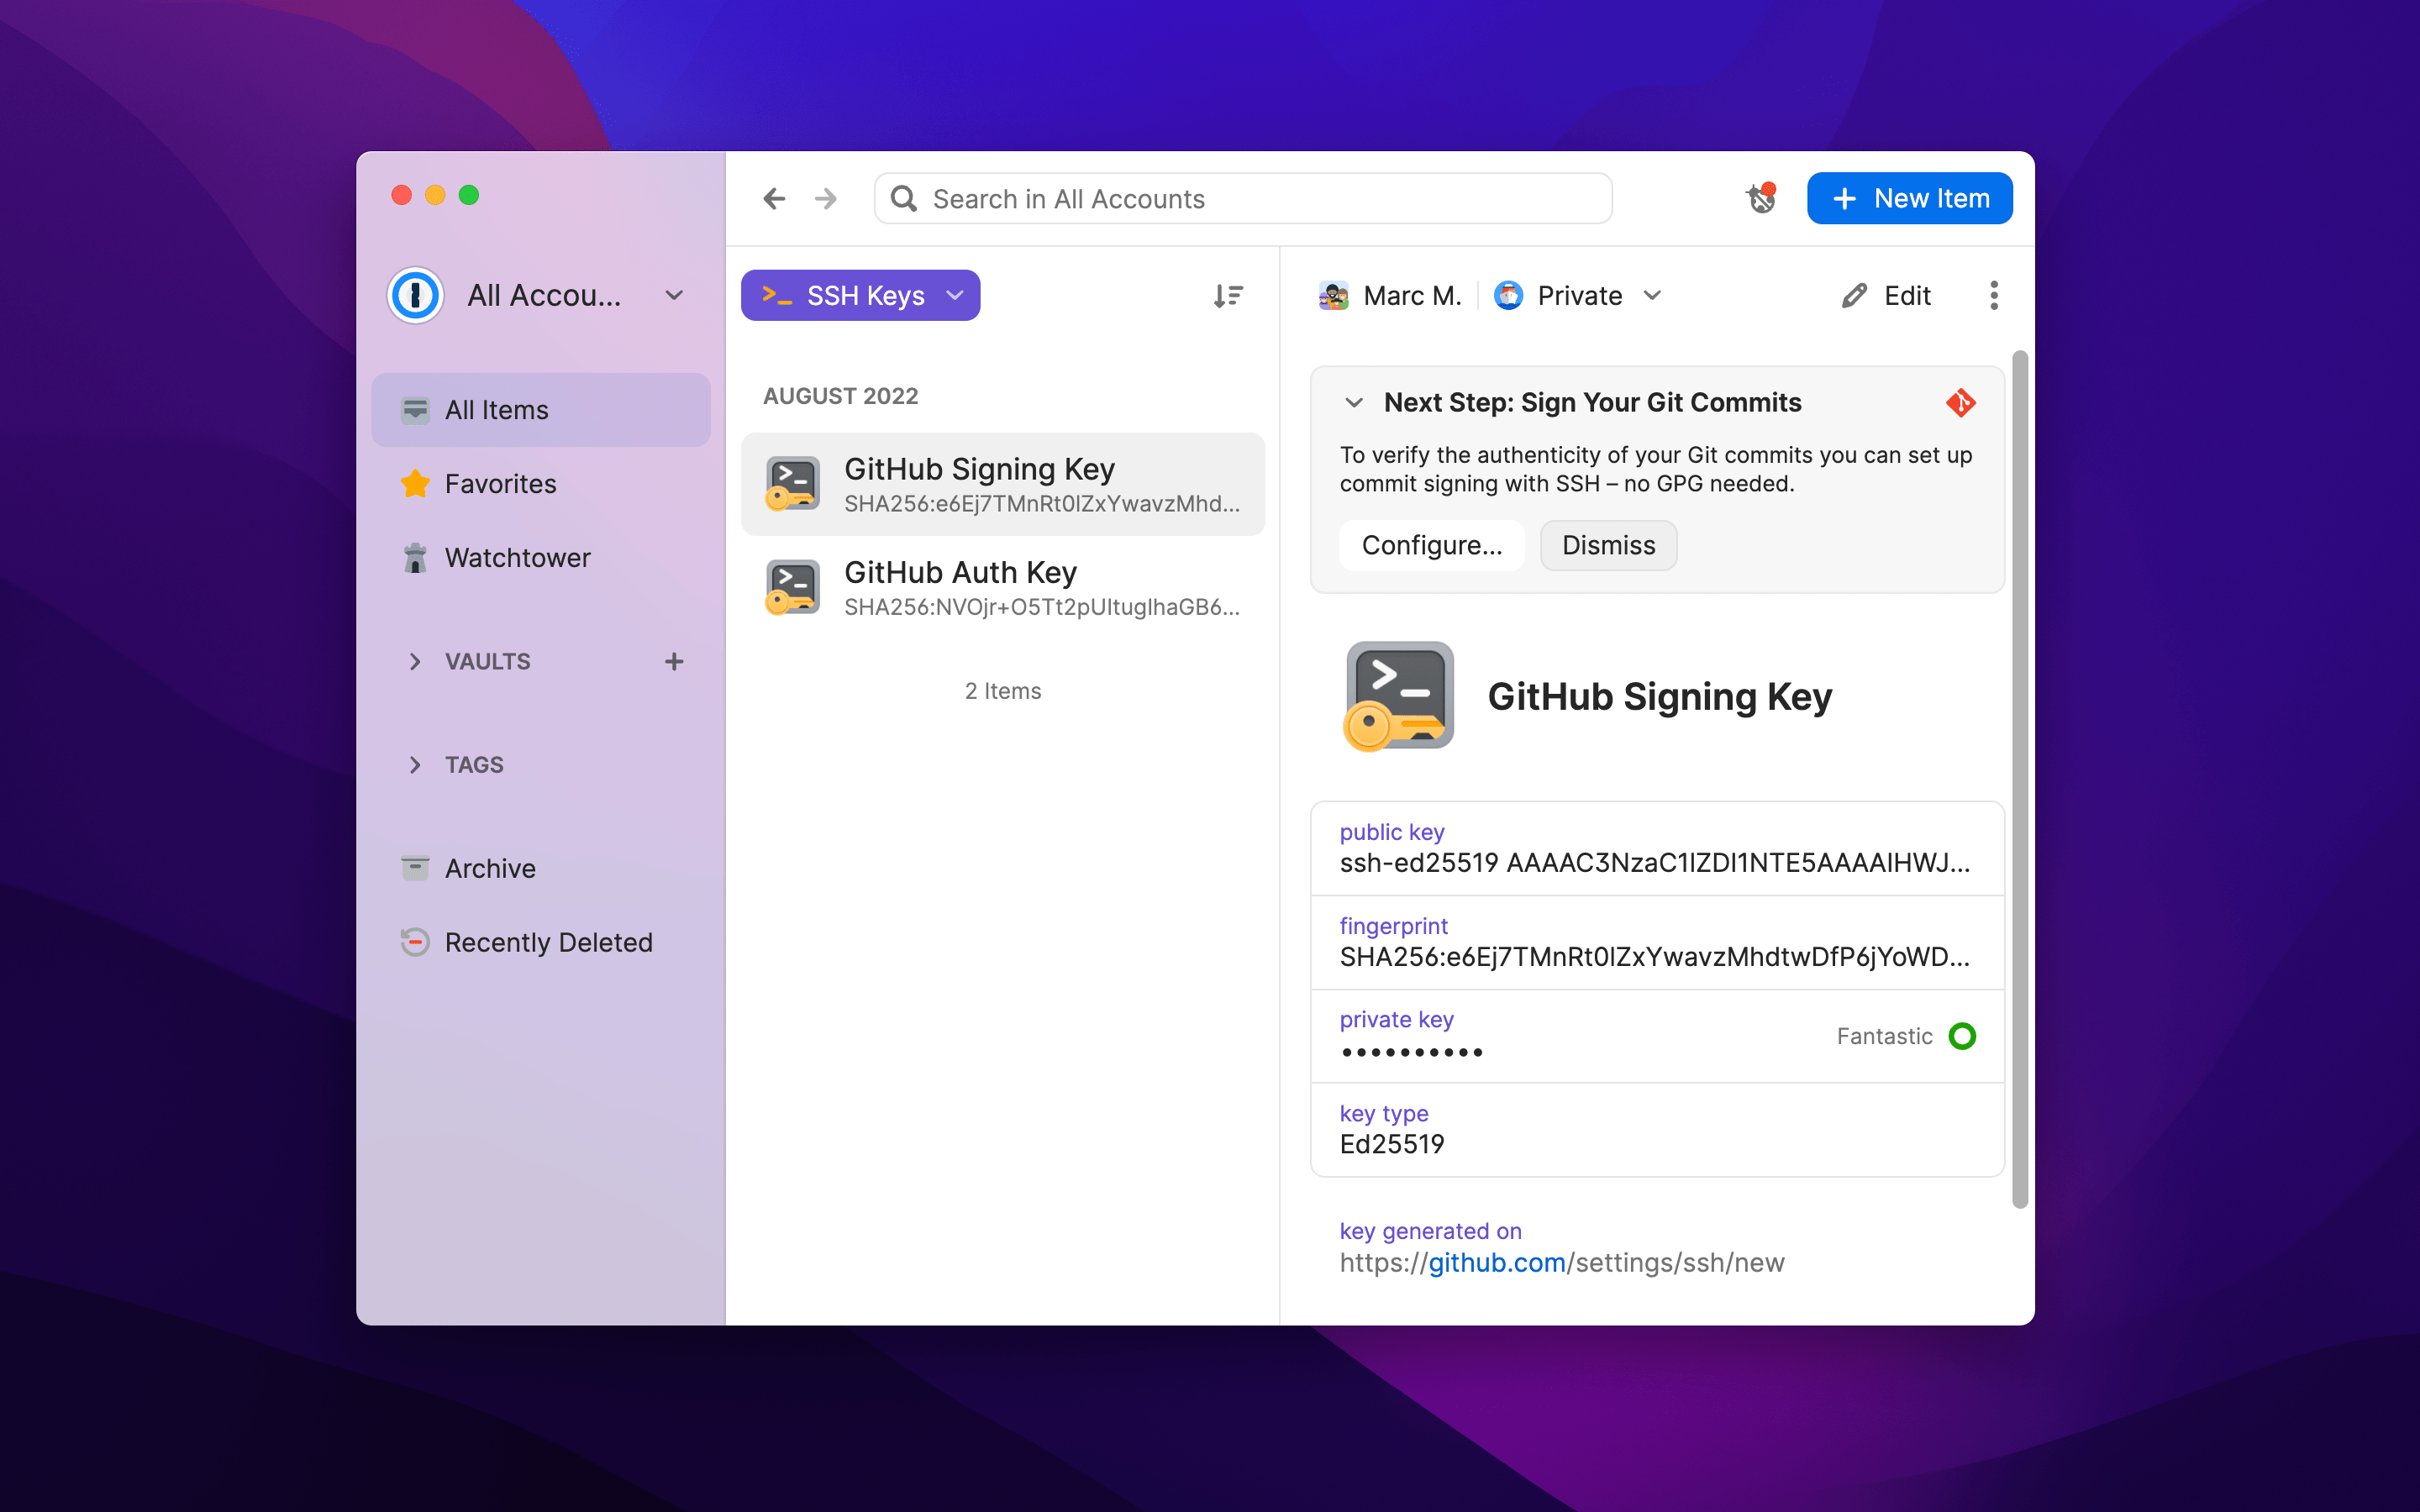
- Configure your local
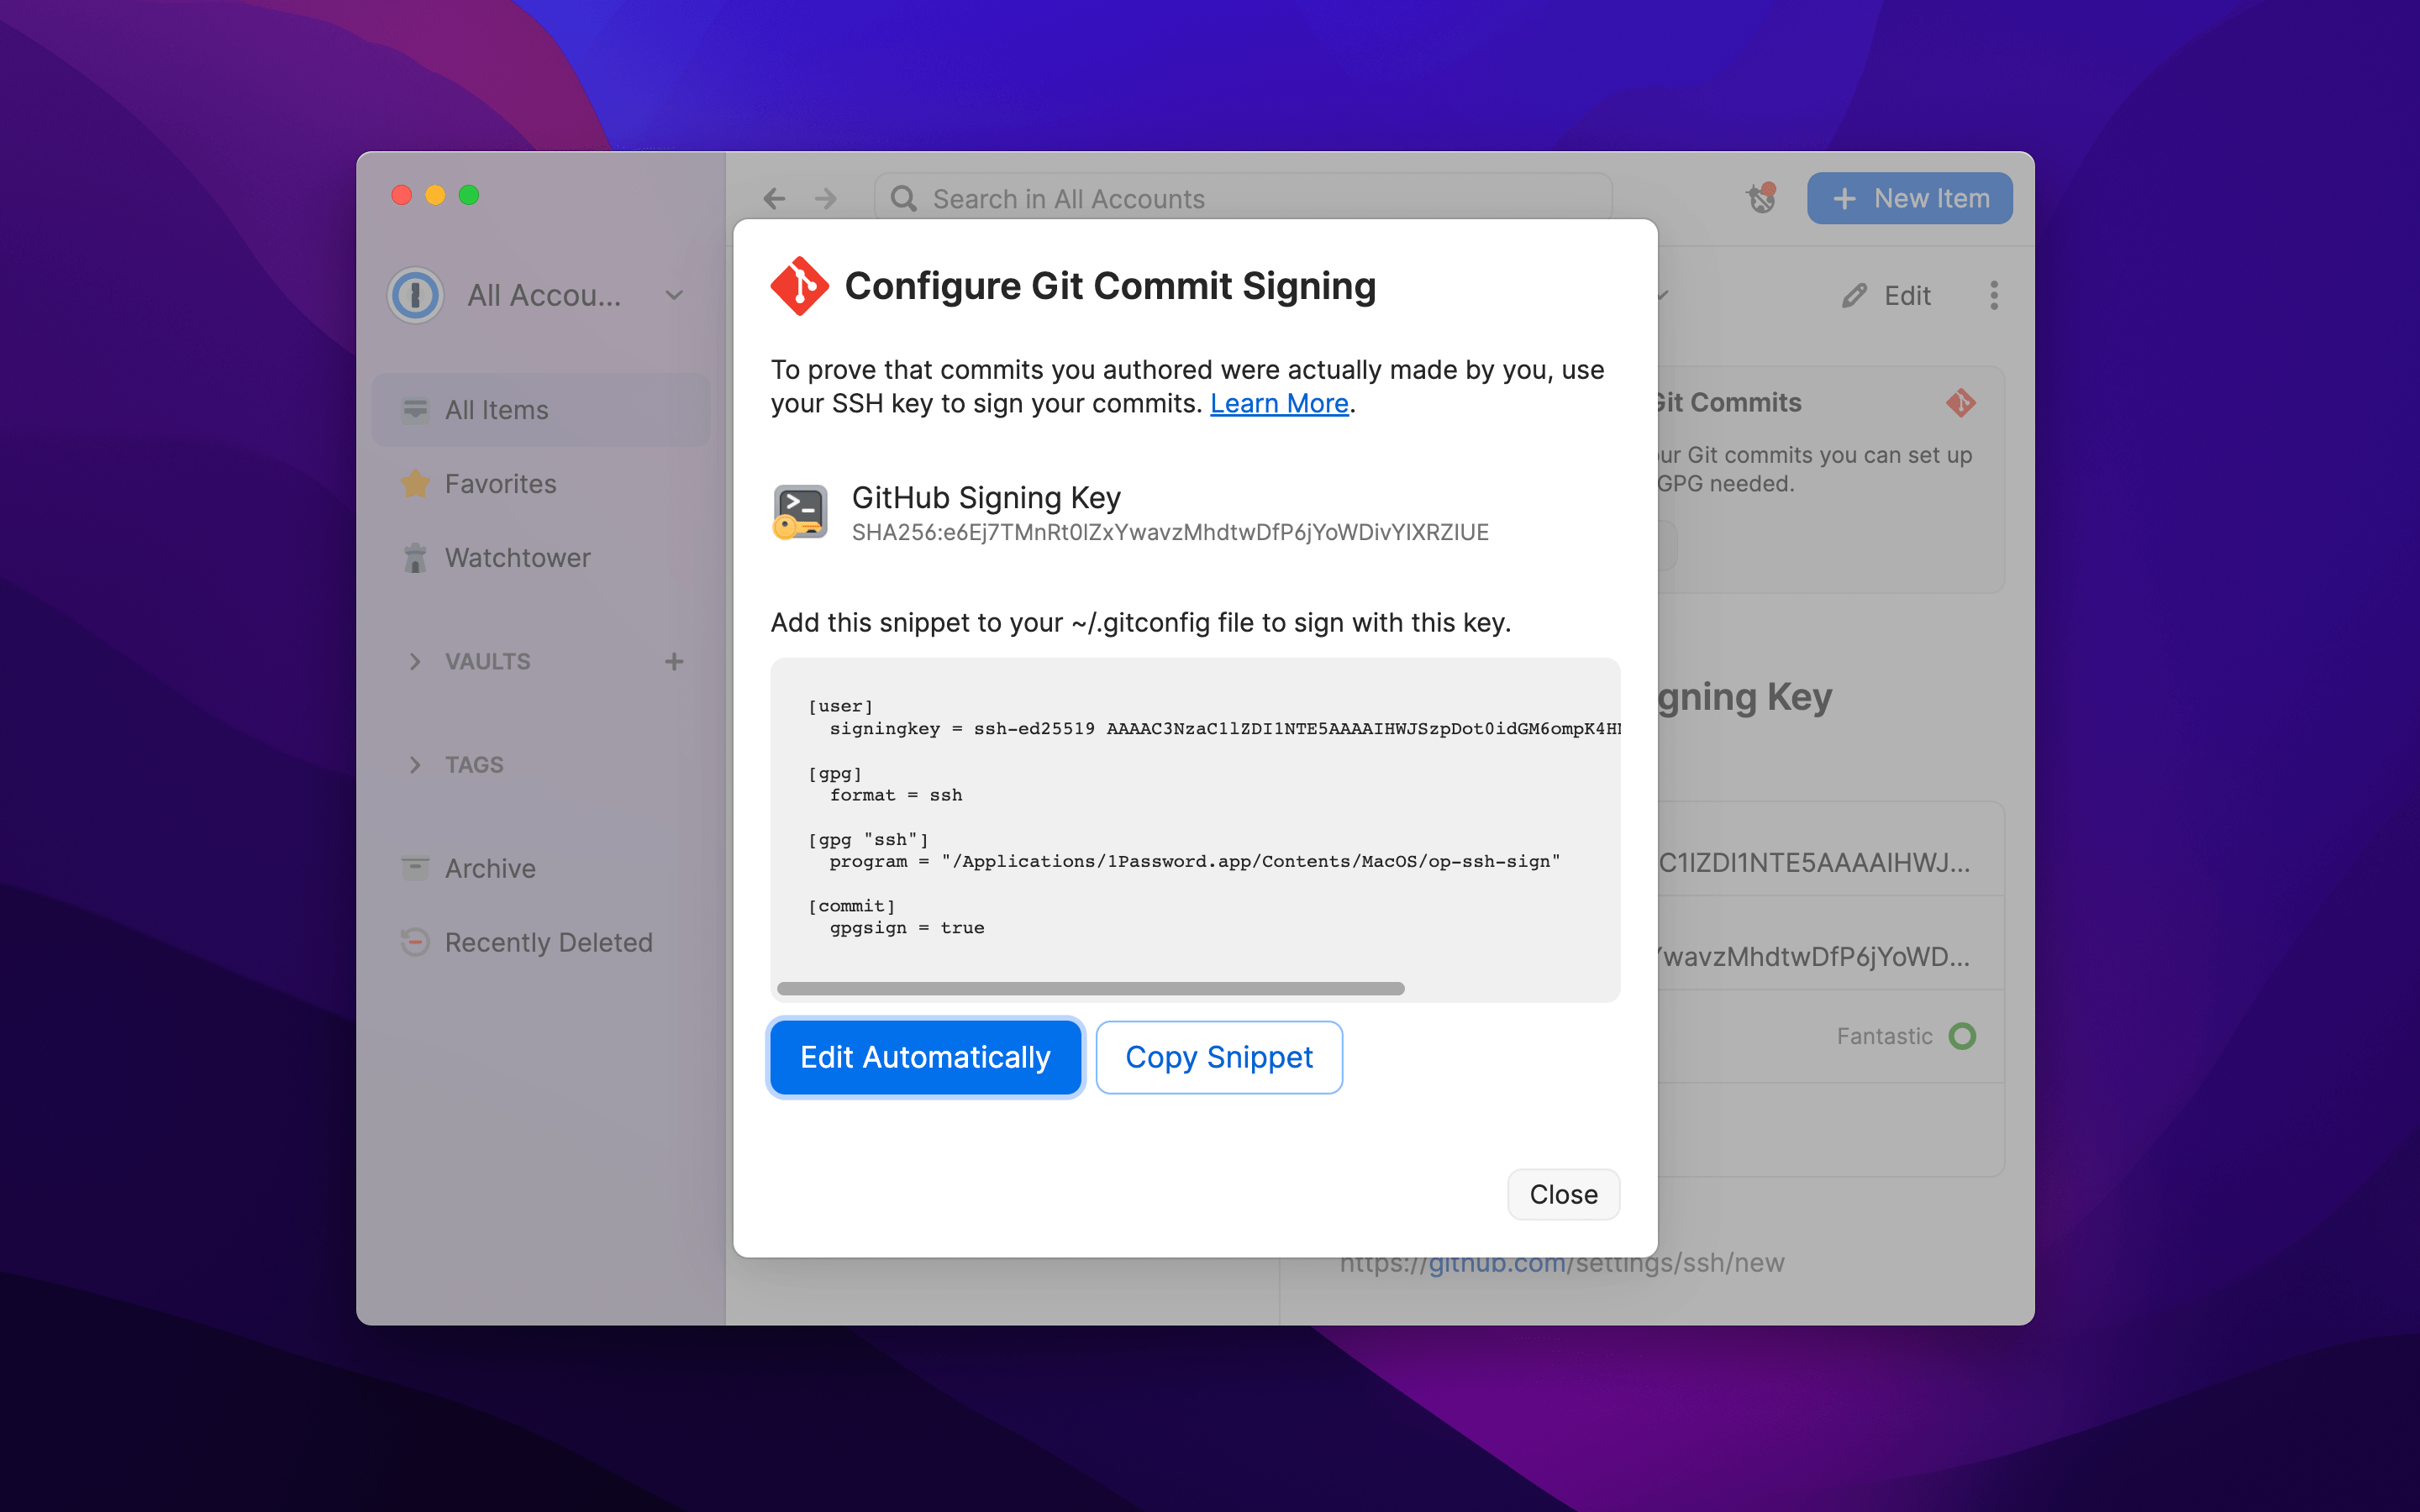
.gitconfig. In 1Password, select your SSH Key and choose the “Configure” option in the banner that appears:
Follow the prompts to configure your .gitconfig file. These settings select your SSH key and use it for signing when you make a git commit.
“Sign in with” anything
1Password will remember the third-party login services (like sign in with Google) that you use. According to the official announcement, this feature will be released soon.