As developers, we often need to connect to remote Linux servers via SSH for development. Tools like VS Code’s Remote-SSH plugin make it feel almost as if we’re working on a local machine. However, a common pain point arises: SSH key management.
We want to:
- Use an SSH key to log in to the server and push code to a Git repository (like GitHub).
- Sign every Git commit to verify its origin.
- Most importantly: avoid copying any files containing private keys to the remote server to prevent key compromise if the server is breached.
Fortunately, we can perfectly solve this problem using the 1Password built-in SSH Agent and SSH Agent Forwarding. This article will guide you step-by-step through the configuration to achieve a secure and seamless remote development workflow.
Introduction to Core Concepts
Before we begin, let’s briefly understand a few key concepts:
-
SSH Agent: Think of it as a temporary key manager. At the beginning of a session, you can load your decrypted private key into the agent. Subsequently, any SSH operation requiring that key will request it from the agent, saving you from repeatedly entering your password. When you close your terminal session, the agent also terminates, and the key is securely cleared.
-
1Password SSH Agent: 1Password 8 and later include a powerful built-in SSH Agent. It securely stores your SSH private keys in your 1Password vault and interacts with your system through a secure socket file. This means your private keys never exist in plaintext on your disk, and all usage requests must be authorized through 1Password (e.g., via Touch ID or your master password).
-
SSH Agent Forwarding: This is a very powerful SSH feature. When you SSH from your local computer to a remote server, it can establish a secure channel that “forwards” requests for key authentication from the remote server back to your local machine, to be handled by your local SSH Agent. This way, the remote server itself doesn’t need to store any private keys at all.
Our Target Workflow
- On our local machine, 1Password manages our SSH private keys.
- We connect to the remote server via VS Code Remote-SSH or the terminal, with Agent Forwarding enabled.
- On the remote server, when we run
git push, the authentication request is forwarded back to the local machine and handled by 1Password. - On the remote server, when we run
git commit, the signing request is also forwarded back to the local machine for authorization by 1Password.
Configuration Process
Prerequisites
- You have installed the 1Password 8 or newer desktop client.
- Your SSH key is already created and saved in the
SSH Keyscategory in 1Password.
Step 1: Configure Your Local Machine to Use 1Password for SSH
First, we need to tell our local SSH client to hand over all key-related requests to 1Password.
-
Enable the SSH Agent in 1Password
- Open the 1Password desktop app.
- Go to
Settings->Developer. - Check the
Use SSH agentbox.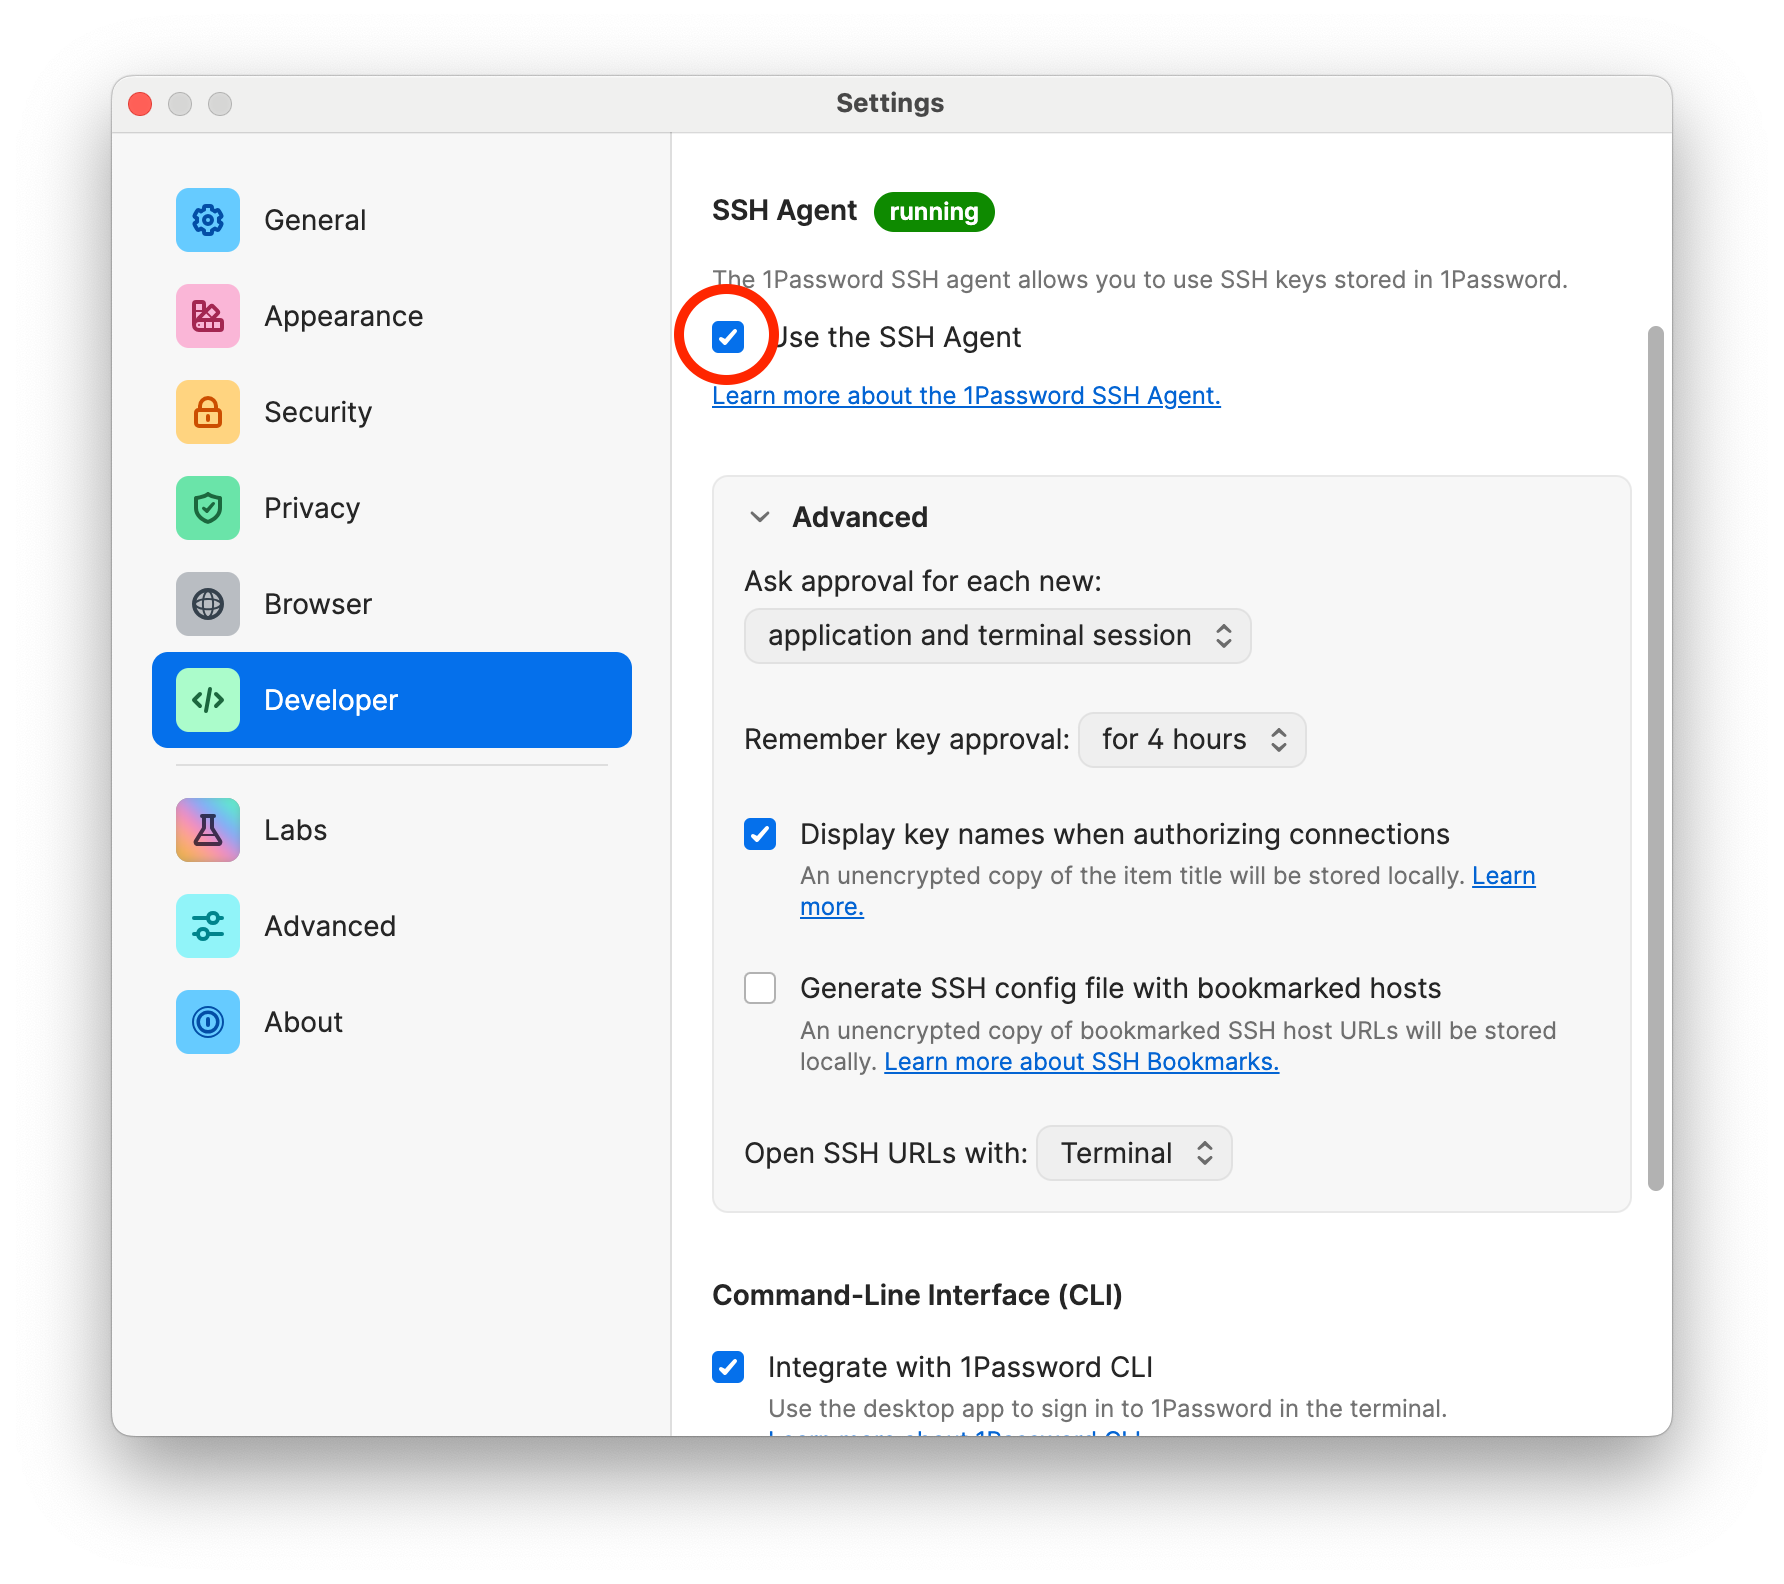
-
Configure Your Local SSH Config File (
~/.ssh/config)According to 1Password’s official documentation, we have two ways to tell the SSH client where the agent is: the
IdentityAgentdirective and theSSH_AUTH_SOCKenvironment variable. UsingIdentityAgentis recommended.Edit the
~/.ssh/configfile on your local machine (create it if it doesn’t exist). Add the following content to the top of the file:1 2 3# Tell all SSH connections (*) to use the 1Password Agent Host * IdentityAgent "~/Library/Group Containers/2BUA8C4S2C.com.1password/t/agent.sock" -
Verify the Configuration
In the terminal on your local machine, run the following command:
1ssh-add -lIf the configuration is successful, it will list the public key fingerprints of all the SSH keys stored in your 1Password. This proves that your local SSH client has successfully connected with 1Password.
Step 2: Configure the Connection to Enable Agent Forwarding
Now, we need to enable the Agent Forwarding feature when connecting to a specific remote server. The best practice is still to modify the ~/.ssh/config file.
Continue editing the ~/.ssh/config file on your local machine and add a dedicated configuration block for your server:
|
|
Host my-dev-server: This is the shortcut alias you’ll use to connect.HostName: The server’s actual IP address or domain name.User: Your username on the server.ForwardAgent yes: This is the switch that turns on Agent Forwarding.
Now, you can connect via ssh my-dev-server or connect directly to my-dev-server in VS Code Remote-SSH, and the forwarding feature will be enabled automatically.
Step 3: Configure Git on the Remote Server
This is the final and most crucial step. We need to tell Git on the remote server how to use our forwarded SSH agent for commit signing.
-
Connect and Verify Forwarding
First, connect to your remote server:
1ssh my-dev-serverOnce connected, run the verification command again in the terminal on the remote server:
1 2 3 4 5 6 7 8 9ssh-add -l ``` If Agent Forwarding is working correctly, the output here should be **exactly the same** as the output on your **local machine**! If you see the error "Could not open a connection to your authentication agent.", check your SSH service configuration to ensure `AllowAgentForwarding yes` is enabled. Open the `/etc/ssh/sshd_config` file with an editor like vim and find the `AllowAgentForwarding` option, setting it to `yes`: ```bash AllowAgentForwarding yesSave the file and restart the SSH service to apply the changes:
1systemctl restart sshdConnect to your remote server again and run
ssh-add -lto confirm that Agent Forwarding is working correctly. -
Get the Public Key for Signing
Git needs to know which specific key to use for signing. We need to provide the full public key string as an identifier. On the remote server, run:
1ssh-add -LThis command lists the full public keys for all keys in the agent. Copy the line for the key you want to use for signing. It will look something like this:
ssh-ed25519 AAAAC3NzaC1lZDI1NTE5AAAAICxxxxxxxxxxxxxxxxxxxx your-key-comment -
Configure the
.gitconfigon the Remote ServerNow, edit the
~/.gitconfigfile on your remote server. Update your existing configuration as follows:1 2 3 4 5 6 7 8 9 10 11 12 13[user] email = your.email@example.com name = Your Name # Set the value of signingkey to the full public key string you copied in the previous step signingkey = ssh-ed25519 AAAAC3NzaC1lZDI1NTE5AAAAICxxxxxxxxxxxxxxxxxxxx your-key-comment [gpg] # Tell Git to use the ssh program for signing format = ssh [commit] # Make all commits signed by default gpgsign = trueThe most important change is
signingkey. We are no longer using a file path but providing the public key itself. This allows Git to directly request the forwarded agent to use this specific key for signing.
All Set! Let’s Test It Out
Everything is ready! On the remote server, navigate to any of your git projects and try creating a new commit:
|
|
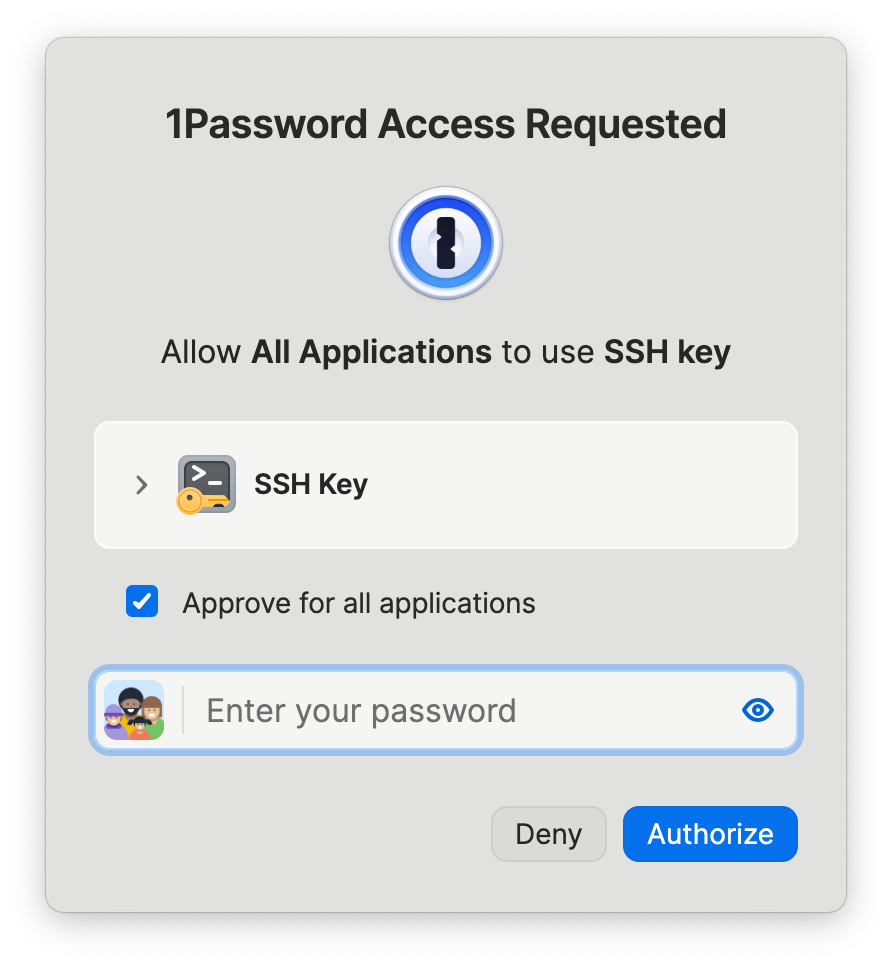
At this moment, something magical happens: an authorization request from 1Password will pop up on your local machine, notifying you that an application is requesting to use your SSH key. After you authorize it with Touch ID or your master password, the git commit command on the remote server completes instantly.
Finally, check your commit log:
|
|
You will see output similar to the following, where Good signature clearly tells you that this commit has been successfully signed by your key!
|
|
Summary
The diagram below illustrates the core workflow for signing remote Git commits using 1Password and SSH Agent Forwarding.

Diagram Components
-
Local Machine (Local)
- Developer: The initiator of the action.
- 1Password SSH Agent: Securely stores the private key and handles all signing requests.
- SSH Client: The local SSH program, configured to use the 1Password Agent and enable forwarding.
-
Remote Server (Remote)
- Remote Terminal: The developer’s workspace on the server.
- Git: The version control tool, configured to use SSH for signing.
- SSH Daemon: The SSH service on the server, responsible for establishing the secure connection and forwarding requests.
Detailed Interaction Flow
- Initiate Commit: The developer executes the
git commitcommand in the Remote Terminal. - Request Signature: Based on its configuration, Git requests a signature using an SSH key from the SSH service.
- Forward Request: The remote server’s SSH Daemon forwards the signing request through the encrypted SSH tunnel back to the local machine’s SSH Client. This is the core of Agent Forwarding.
- Request 1Password: The local SSH Client passes the request to the 1Password SSH Agent.
- Request User Authorization: 1Password displays a prompt on the local machine, asking the Developer for authorization.
- User Authorizes: The Developer authenticates locally (e.g., with Touch ID or master password).
- Return Signature: Upon successful authorization, 1Password generates the signature and returns it to the local SSH Client.
- Return Signature to Remote: The signature is securely transmitted back through the SSH tunnel to the remote server’s SSH Daemon.
- Complete Commit: The remote Git process receives the valid signature, successfully creates the commit, and displays a success message in the Remote Terminal.
By following the steps above, we have built a remote development workflow that is both secure and convenient. Your private key always remains safely in your local 1Password vault, while all Git operations on the remote server (authentication and signing) can use it seamlessly and securely. This not only enhances security but also greatly simplifies key management in multi-server environments, allowing you to focus more on coding itself.